If you've gone through the basic first game in modern JavaScript or the infinite jumper book then you've got the basics down so let's try making something a little bit more complicated!
We suggest Memory Match. A Mario Party-inspired memory game where you control a character to pick boxes until all matches are found within a limited amount of time.
In this final part, we will look at adding a countdown timer that will cause the player to lose when time runs out.
We also have a video version on YouTube if you prefer to watch or want to see how it is coded in real-time.
Controlling a Countdown
We can add some challenge to Memory Match by adding a timer that shows how much time the player has left to find all the matches.
Let's start by creating a CountdownController class to hold all the logic for counting down and updating a Text display to show how much time is left.
Create a new CountdonwController.js file in the scenes folder with this barebones set up:
|
|
This class takes in a Scene reference and Text reference. We will pass these in when we created a new CountdownController in the Game Scene.
Then we have 3 unimplemented methods: start(), stop(), and update().
The start() method will begin the countdown and then call a callback function when it is finished. An optional duration can be passed in to change how long the countdown should be.
Then the stop() method will stop the countdown and the update() method will handle calculating the current time remaining and updating the passed in Text instance stored in this.label.
That's the structure of this class. Notice that it does not extend from a Phaser class or have a visual component. It is a plain JavaScript class that controls a visual Text object. Hence the name Countdown Controller.
Creating a Timer
With the CountdownController skeleton ready, we can simply implement each method to perform their specific tasks.
Let's start with the start() method. It will create a TimerEvent and then invoke a given callback when it is finished.
|
|
First, we call stop() just in case there is already another TimerEvent running. This CountdownController assumes just 1 countdown at a time.
Then we create a TimerEvent using this.scene.time.addEvent() by passing in a configuration object with a duration or delay and a callback.
Notice that timerEvent is a class property so we should add that to the class like this:
|
|
Lastly, once this timer is finished we execute the callback if one was given.
Next, let's see what the stop() method looks like:
|
|
This very simply checks if this.timerEvent exists and then destroys it if it does. Nothing will happen if this.timerEvent is already undefined.
Last method left is the update() method. This is where the countdown time math happens.
|
|
We early exit if there is no timerEvent or if the duration is 0 or less.
Then we get the elapsed time from the timerEvent and subtract it from the total duration to get time remaining. Time remaining is in milliseconds so we divide by 1000 to get time in seconds.
With time in seconds, we set this.label to show the time up to 2 decimal places with toFixed(2).
Finally, notice that we are using this.duration which is a class property so add that to the class and set it to the duration argument given to start() like this:
|
|
And that is the complete CountdownController class!
Using CountdownController from Game
Using the CountdownController means we need to create an instance by passing in the Scene and a Text object. Then we call start() to begin the countdown and make sure that update() is called from the Scene's update() method.
Here's how we create a CountdownController in the Game Scene:
|
|
First, we import the CountdownController class so that we can use it in the Game Scene.
Then we create a class property on line 11 and set it to a new instance on line 22 with a newly added timerLabel.
Next, we need to make sure the countdown's update() method is being called:
|
|
Make sure to also call stop() when all matches have been found in the checkForMatch() method:
|
|
Now, we need to call start() and pass in a callback method when the countdown is finished.
Add this after we create a new instance of CountdownController in the create() method:
|
|
We are passing in the handleCountdownFinished() method so we'll have to create it.
Notice that we are using .bind(this). This will return a new function based on the handleCountdownFinished() method with its context set as this whenever it is invoked.
Here's what handleCountdownFinished() looks like:
|
|
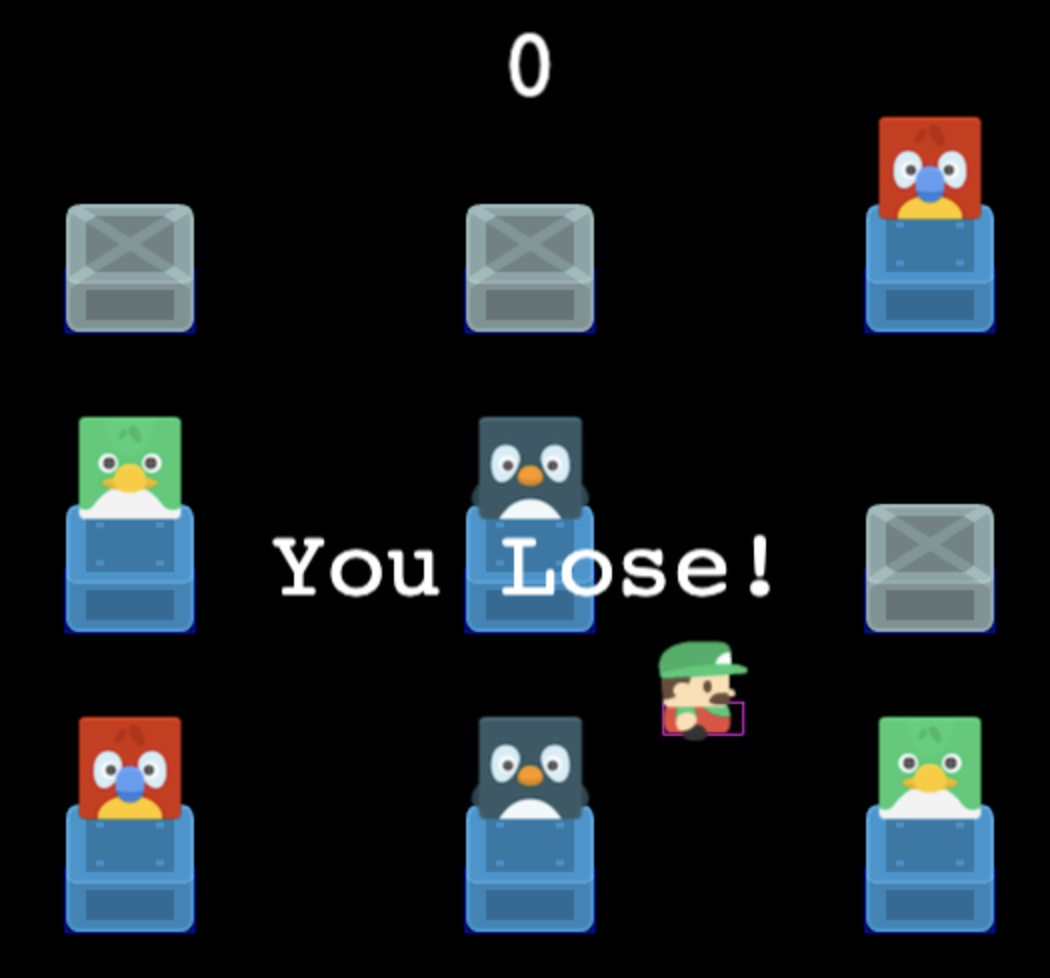
This should look fairly similar to the logic when a level is completed except we show a “You Lose!” message instead.
You should see something like this when the countdown expires and not all matches have been found 👇
Memory Match Extras
We hope you've enjoyed making Memory Match! There's a bunch more you can add to this game to make it your own.
Some core improvements you can add are:
- music
- sound effects
- restart after losing
- better fonts (Web or Bitmap)
- preload animation
That's why we created the Memory Match Extras video course that covers all these things plus gamepad support 🎮, code organization & clean-up 💻, using nineslice for dialogs 🔪, and more!
Learn more in this short preview 👇
There are even bonuses to help you debug code and navigate the official Phaser documentation better so that you can solve more of your own problems without hoping for a response on forums or Discord.
Check out the course page to learn more!
Next Steps
You can find the complete source code for the Memory Match game we created in this series here.
Use it as a way to compare and contrast against what you did. The Memory Match Extras course comes with an updated & improved source code plus a TypeScript version.
If you are not yet ready for a course then be sure to sign up for our newsletter so you don't miss any future Phaser 3 game development tips and techniques!
Drop your email into the box below.
Don't miss any Phaser 3 game development content
Subscribers get exclusive tips & techniques not found on the blog!
Join our newsletter. It's free. We don't spam. Spamming is for jerks.