Are you trying to use tilemaps created with Tiled in your Phaser 3 game?
There's a great article by Michael Hadley that you may have come across.
If that tutorial hasn't worked out because you couldn't get the tilemap to display then this guide is for you.
We've include steps to test each part of the implementation so that you can catch problems before you've written a bunch of code and can't tell where or when something went wrong.
If you run into a problem that we didn't cover then let us know in the comments below and we will make an update. 🤗
We also have this tool that will generate the basic code for you when given the exported JSON file!
Project Setup
This guide uses the phaser3-parcel-template but we will try to make the steps applicable to any project setup.
Create your project by following directions from the Github repository or check out this article.
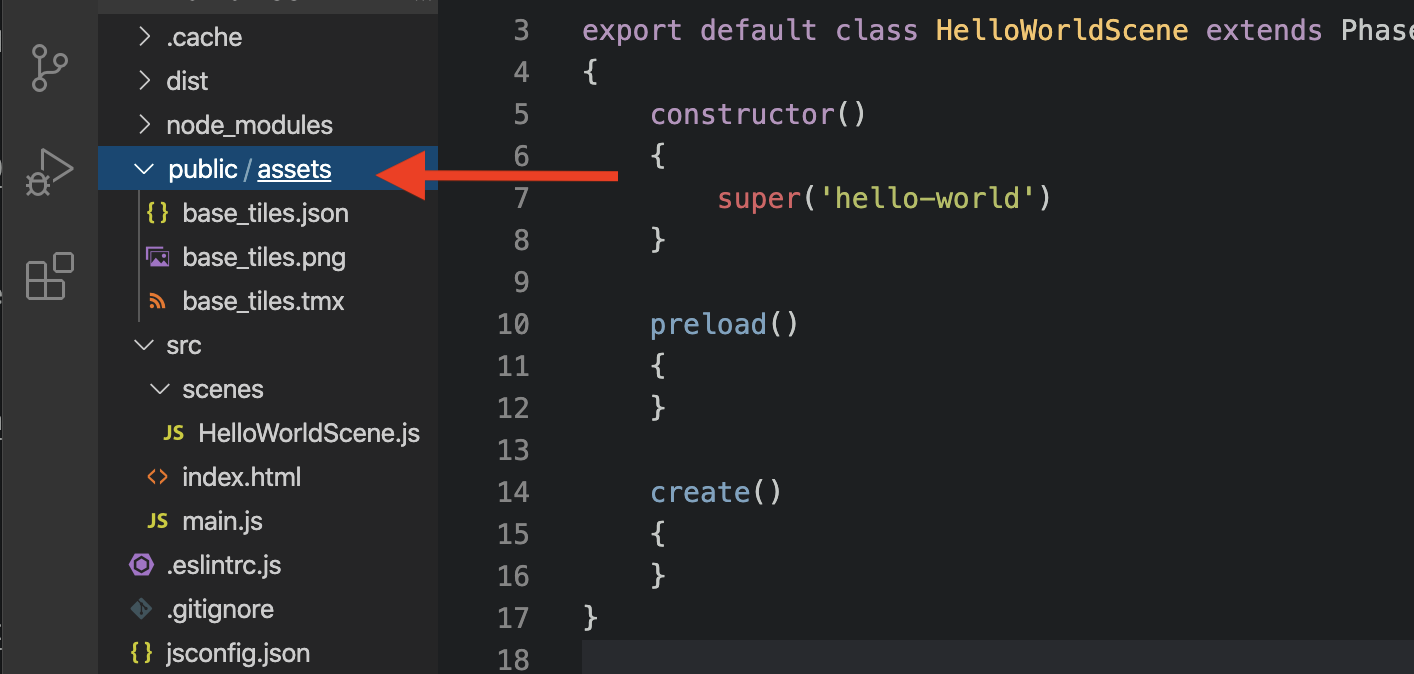
Then, go to the HelloWorldScene.js file in the src folder and delete everything inside the preload() and create() methods.
You'll end up with this:
|
|
The phaser3-parcel-template uses modern JavaScript and you should as well. It'll save you from having to deal with a host of weird bugs as a beginner.
We have a free book to help you get started so there's no excuse. Get the book and level up your skills!
Learn to make an Infinite Jumper in Phaser 3 with modern JavaScript!
Drop your email into the box below to get this free 60+ page book and join our newsletter.
Use the npm run start command from the terminal to start the development server. Once ready, you can go to http://localhost:8000 in your browser and see a black screen.
Check for any errors by launching the Developer Tools–right click on the page and pick Inspect. Then go to the Console tab to check for any red errors.
If you are not using Chrome then the exact wording might be different but the general steps will be the same.
There should be no errors at this stage but if you do have them then you know that your initial project set up is to blame.
Go back through the steps from the Github repository and make sure you didn't skip anything that you didn't understand.
Some steps might not look like anything to you but the computer is like a petulant child who will not comply until all demands are met!
Exporting a Tilemap from Tiled
There are a few important things to remember when exporting a tilemap from Tiled for Phaser 3.
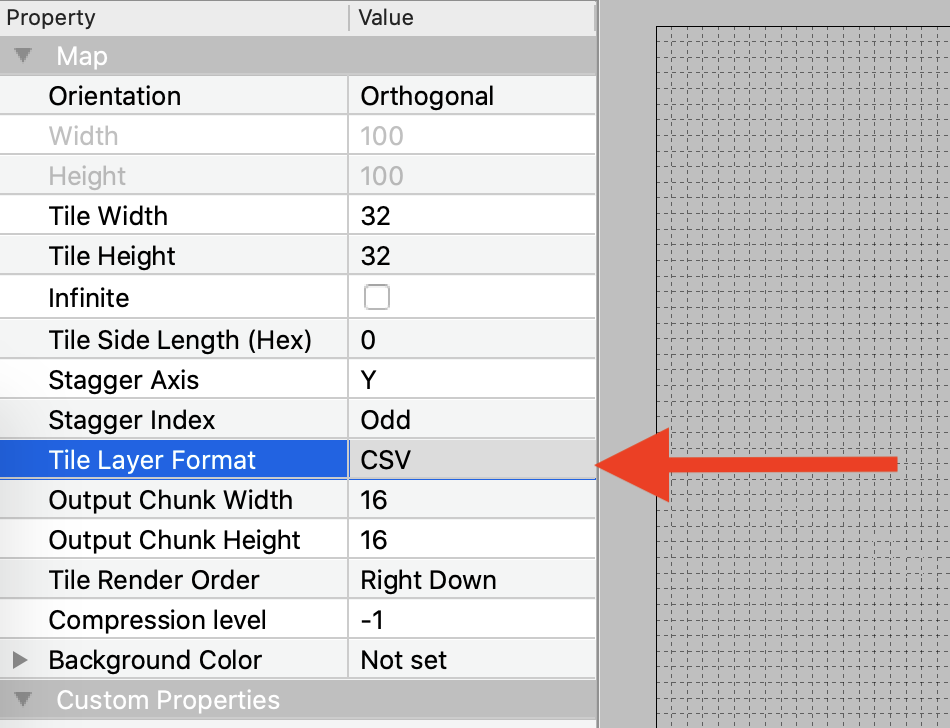
First, Your tile layers have to be in an uncompressed format: either CSV or Base64 (uncompressed).
Second, when creating a Tileset you need to check the “Embed in Map” option.
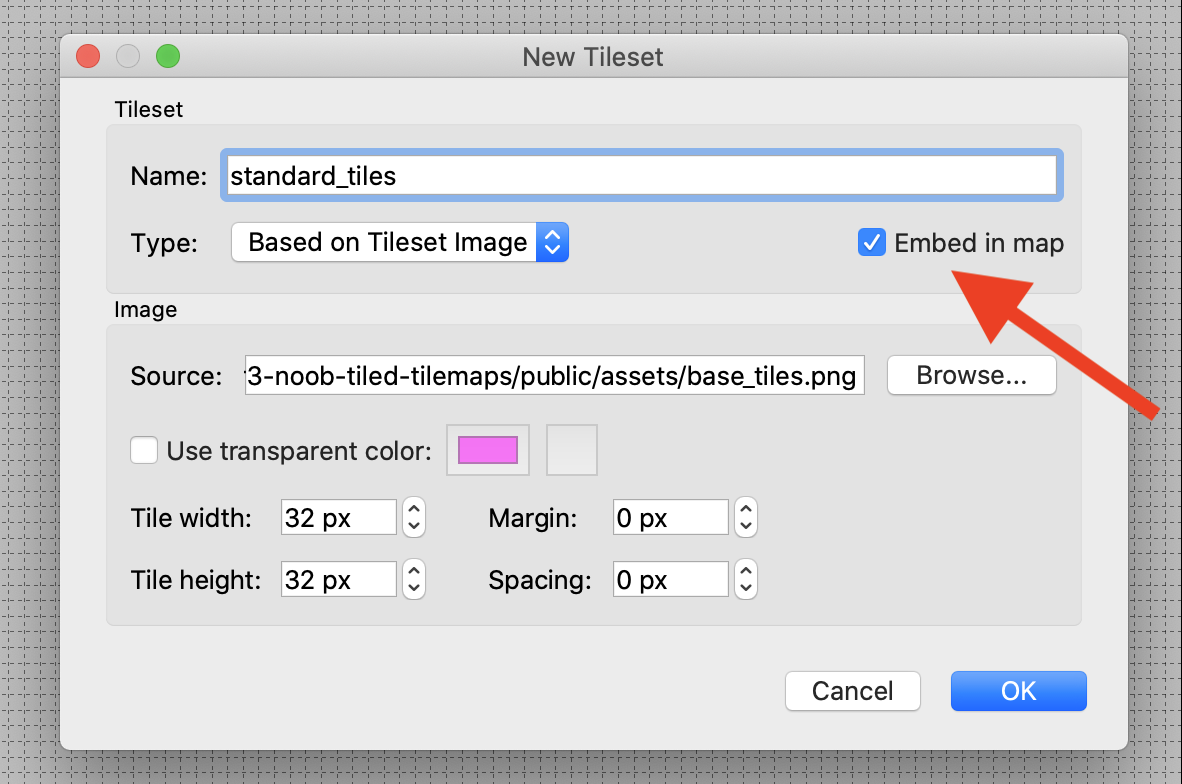
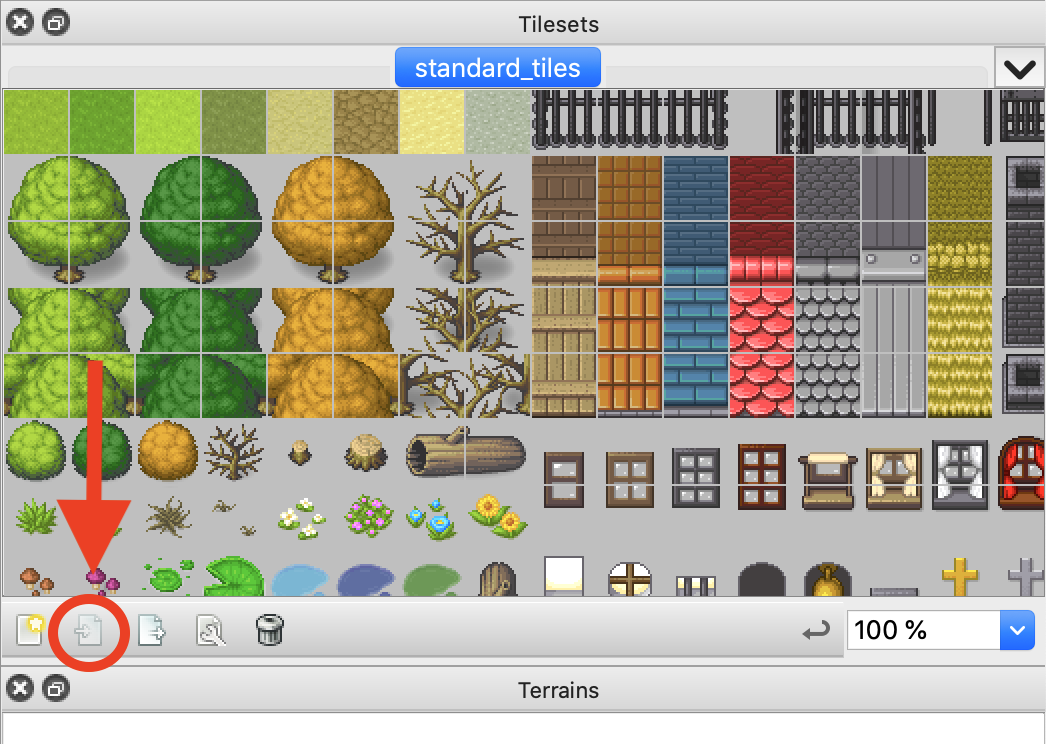
If you've already created a Tileset then you can use the “Embed Tileset” button in the Tilesets window.
Lastly, you need to export your Tilemap as a JSON file. You can do that by going to File > Export As and then selecting “JSON map files (*.json)". The filename will end in .json if you did it right.
Where to save TMX, PNG, and JSON files?
For simplicity, we recommend you save these 3 files in the same place. You will only need the PNG and JSON files for Phaser but you might want to go back to the TMX file to make changes.
Keeping these files together will just make it easier for you to find them later.
Make sure the files are in a place that your development server can see.
In our example, we put the files in an “assets” folder inside the “public” folder. You will need to create these folders on the same level as the “src” folder.
Check that your static files can be served
Let's do a sanity check before we write any code.
Start the development server with npm run start or the equivalent command for your project.
Then go to http://localhost:8000/assets/base_tiles.png (or wherever static assets are expected to be served from) and the tileset image should be loaded.
If it does not load your PNG file then something is wrong. For the phaser3-parcel-template, you may have to restart the development server if you added the public folder while it was running.
Phaser will not be able to load your tilemap files if you cannot manually load them from the browser. There is no magic here. ✨
Make sure this works before continuing. If it doesn't work now then it also won't work later.
Loading an Exported Tilemap
Phaser will need the tileset PNG file and the exported JSON file. Both should be loaded in preload().
|
|
We load the tileset image on line 4 by setting the key for the image to 'base_tiles' and passing in the path to the PNG file.
Line 7 loads the exported JSON file in a similar way by setting the key for the tilemap to be 'tilemap' and passing in the path to the JSON file.
The create() method does a sanity check to make sure that we've loaded the files correctly by displaying the tileset image.
If you see a green box or nothing then your path is wrong or you have a typo.
You can also try using the full URL from the previous section as the path.
Creating Tile Layers
Your Tilemap should consist of 1 or more Tile Layers. This is what it looks like in Tiled:

Fence, Rock, Trees, Ground, and Background are all tile layers.
When you create a Tilemap in Phaser it will not automatically create these tile layers. You need to specify exactly which layers to create and in what order.
|
|
The Tilemap instance is created on line 7 using the same key that we used in preload() to load the exported JSON.
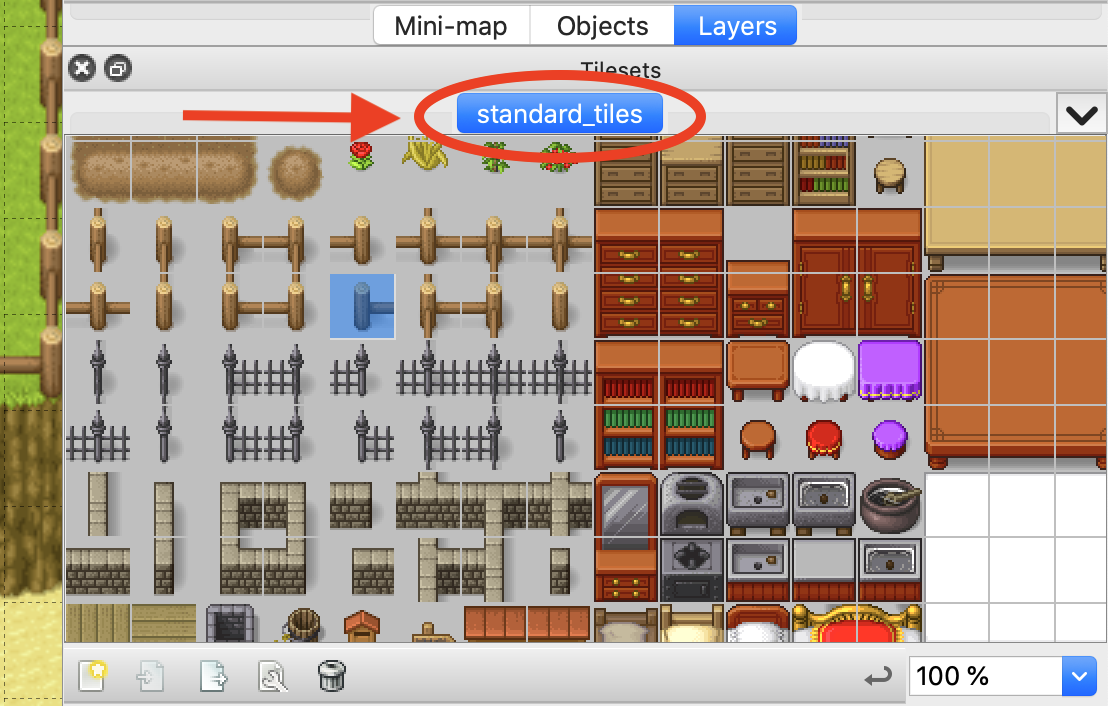
Then on line 10, we add a tileset image to the Tilemap. Take note of the two string parameters: 'standard_tiles' and 'base_tiles'.
The second is the key we used when loading the PNG file in preload().
The first is the name of the tileset we used when creating the tileset in Tiled.
After creating the map and tileset, we can create each tile layer we want. The order we create each layer will determine the draw order.
The first one created will be drawn first and then the next one will be drawn on top.
Next Steps
Remember that you need to export your Tilemap as a JSON file each time you make changes to the TMX file.
Just saving the TMX file will not result in updates to the JSON file that is loaded by Phaser. 😎
If you are making a top-down game like a dungeon crawler or RPG then this 8.5 Part YouTube series can help you with collision, character movement, enemies, and more!
Be sure to sign up for our newsletter so you don't miss any future Phaser 3 game development tips and techniques!
Drop your email into the box below.
Don't miss any Phaser 3 game development content
Subscribers get exclusive tips & techniques not found on the blog!
Join our newsletter. It's free. We don't spam. Spamming is for jerks.